# 处理 url
在 hello-koa 工程中,我们处理 http 请求一律返回相同的 HTML,这样虽然非常简单,但是用浏览器一测,随便输入任何 URL 都会返回相同的网页。
正常情况下,我们应该对不同的 URL 调用不同的处理函数,这样才能返回不同的结果。例如像这样写:
app.use(async (ctx, next) => {
  if (ctx.request.path === "/") {
    ctx.response.body = "index page";
  } else {
    await next();
  }
});

app.use(async (ctx, next) => {
  if (ctx.request.path === "/test") {
    ctx.response.body = "TEST page";
  } else {
    await next();
  }
});

app.use(async (ctx, next) => {
  if (ctx.request.path === "/error") {
    ctx.response.body = "ERROR page";
  } else {
    await next();
  }
});
2
3
4
5
6
7
8
9
10
11
12
13
14
15
16
17
18
19
20
21
22
23
这么写是可以运行的,但是好像有点蠢。
应该有一个能集中处理 URL 的 middleware,它根据不同的 URL 调用不同的处理函数,这样,我们才能专心为每个 URL 编写处理函数。
# koa-router
为了处理 URL,我们需要引入 koa-router 这个 middleware,让它负责处理 URL 映射。
先在 package.json 中添加依赖项,在 vscode 控制终端中
npm install koa-router --save

或者

yarn add koa-router
2
3
4
5
6
接下来,我们修改 app.js,使用 koa-router 来处理 URL:
const Koa = require("koa");

// 注意require('koa-router')返回的是函数:
const router = require("koa-router")();

const app = new Koa();

// log request URL:
app.use(async (ctx, next) => {
  console.log(`Process ${ctx.request.method} ${ctx.request.url}...`);
  await next();
});

// add url-route:
router.get("/hello/:name", async (ctx, next) => {
  var name = ctx.params.name;
  ctx.response.body = `<h1>Hello, ${name}!</h1>`;
});

router.get("/", async (ctx, next) => {
  ctx.response.body = "<h1>Index</h1>";
});

// add router middleware:
app.use(router.routes());

app.listen(3000);
console.log("app started at port 3000...");
2
3
4
5
6
7
8
9
10
11
12
13
14
15
16
17
18
19
20
21
22
23
24
25
26
27
28
注意导入 koa-router 的语句最后的()是函数调用:
const router = require("koa-router")();
相当于:
const fn_router = require('koa-router');
const router = fn_router();
2
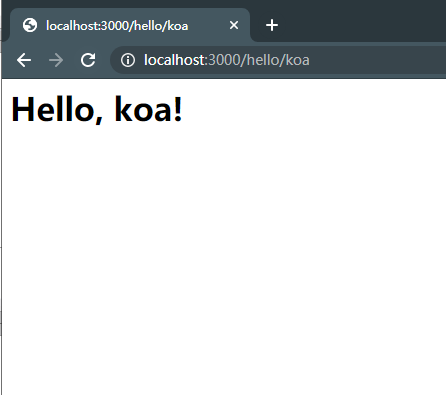
然后,我们使用 router.get('/path', async fn)来注册一个 GET 请求。可以在请求路径中使用带变量的/hello/:name,变量可以通过 ctx.params.name 访问。
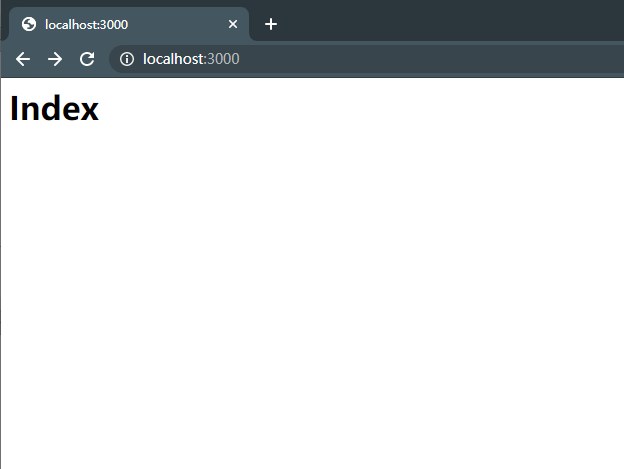
再运行 app.js,我们就可以测试不同的 URL:
输入首页:http://localhost:3000/
输入:http://localhost:3000/hello/koa
# 处理 post 请求
用 router.get('/path', async fn)处理的是 get 请求。如果要处理 post 请求,可以用 router.post('/path', async fn)。
用 post 请求处理 URL 时,我们会遇到一个问题:post 请求通常会发送一个表单,或者 JSON,它作为 request 的 body 发送,但无论是 Node.js 提供的原始 request 对象,还是 koa 提供的 request 对象,都不提供解析 request 的 body 的功能!
所以,我们又需要引入另一个 middleware 来解析原始 request 请求,然后,把解析后的参数,绑定到 ctx.request.body 中。
koa-bodyparser 就是用来干这个活的。
先在 package.json 中添加依赖项,在 vscode 控制终端中
npm install koa-bodyparser --save

或者

yarn add koa-bodyparser
2
3
4
5
6
下面,修改 app.js,引入 koa-bodyparser:
const bodyParser = require("koa-bodyparser");
在合适的位置加上:
app.use(bodyParser());
由于 middleware 的顺序很重要,这个 koa-bodyparser 必须在 router 之前被注册到 app 对象上。
现在我们就可以处理 post 请求了。写一个简单的登录表单:
router.get("/", async (ctx, next) => {
  ctx.response.body = `<h1>Index</h1>
        <form action="/signin" method="post">
            <p>Name: <input name="name" value="koa"></p>
            <p>Password: <input name="password" type="password"></p>
            <p><input type="submit" value="Submit"></p>
        </form>`;
});

router.post("/signin", async (ctx, next) => {
  var name = ctx.request.body.name || "",
    password = ctx.request.body.password || "";
  console.log(`signin with name: ${name}, password: ${password}`);
  if (name === "koa" && password === "12345") {
    ctx.response.body = `<h1>Welcome, ${name}!</h1>`;
  } else {
    ctx.response.body = `<h1>Login failed!</h1>
        <p><a href="/">Try again</a></p>`;
  }
});
2
3
4
5
6
7
8
9
10
11
12
13
14
15
16
17
18
19
20
注意到我们用 var name = ctx.request.body.name || ''拿到表单的 name 字段,如果该字段不存在,默认值设置为''。
类似的,put、delete、head 请求也可以由 router 处理。
# 重构
现在,我们已经可以处理不同的 URL 了,但是看看 app.js,总觉得还是有点不对劲。
所有的 URL 处理函数都放到 app.js 里显得很乱,而且,每加一个 URL,就需要修改 app.js。随着 URL 越来越多,app.js 就会越来越长。
如果能把 URL 处理函数集中到某个 js 文件,或者某几个 js 文件中就好了,然后让 app.js 自动导入所有处理 URL 的函数。这样,代码一分离,逻辑就显得清楚了。最好是这样:
hello-koa/
|
+- .vscode/
|  |
|  +- launch.json <-- VSCode 配置文件
|
+- controllers/
|  |
|  +- login.js <-- 处理login相关URL
|  |
|  +- users.js <-- 处理用户管理相关URL
|
+- app.js <-- 使用koa的js
|
+- package.json <-- 项目描述文件
|
+- node_modules/ <-- npm安装的所有依赖包
2
3
4
5
6
7
8
9
10
11
12
13
14
15
16
17
于是我们准备重构这个项目。
我们先在 controllers 目录下编写 index.js:
var fn_index = async (ctx, next) => {
  ctx.response.body = `<h1>Index</h1>
        <form action="/signin" method="post">
            <p>Name: <input name="name" value="koa"></p>
            <p>Password: <input name="password" type="password"></p>
            <p><input type="submit" value="Submit"></p>
        </form>`;
};

var fn_signin = async (ctx, next) => {
  var name = ctx.request.body.name || "",
    password = ctx.request.body.password || "";
  console.log(`signin with name: ${name}, password: ${password}`);
  if (name === "koa" && password === "12345") {
    ctx.response.body = `<h1>Welcome, ${name}!</h1>`;
  } else {
    ctx.response.body = `<h1>Login failed!</h1>
        <p><a href="/">Try again</a></p>`;
  }
};

module.exports = {
  "GET /": fn_index,
  "POST /signin": fn_signin,
};
2
3
4
5
6
7
8
9
10
11
12
13
14
15
16
17
18
19
20
21
22
23
24
25
这个 index.js 通过 module.exports 把两个 URL 处理函数暴露出来。
类似的,hello.js 把一个 URL 处理函数暴露出来:
var fn_hello = async (ctx, next) => {
  var name = ctx.params.name;
  ctx.response.body = `<h1>Hello, ${name}!</h1>`;
};

module.exports = {
  "GET /hello/:name": fn_hello,
};
2
3
4
5
6
7
8
现在,我们修改 app.js,让它自动扫描 controllers 目录,找到所有 js 文件,导入,然后注册每个 URL:
// 先导入fs模块,然后用readdirSync列出文件
// 这里可以用sync是因为启动时只运行一次,不存在性能问题:
var files = fs.readdirSync(__dirname + "/controllers");

// 过滤出.js文件:
var js_files = files.filter((f) => {
  return f.endsWith(".js");
});

// 处理每个js文件:
for (var f of js_files) {
  console.log(`process controller: ${f}...`);
  // 导入js文件:
  let mapping = require(__dirname + "/controllers/" + f);
  for (var url in mapping) {
    if (url.startsWith("GET ")) {
      // 如果url类似"GET xxx":
      var path = url.substring(4);
      router.get(path, mapping[url]);
      console.log(`register URL mapping: GET ${path}`);
    } else if (url.startsWith("POST ")) {
      // 如果url类似"POST xxx":
      var path = url.substring(5);
      router.post(path, mapping[url]);
      console.log(`register URL mapping: POST ${path}`);
    } else {
      // 无效的URL:
      console.log(`invalid URL: ${url}`);
    }
  }
}
2
3
4
5
6
7
8
9
10
11
12
13
14
15
16
17
18
19
20
21
22
23
24
25
26
27
28
29
30
31
如果上面的大段代码看起来还是有点费劲,那就把它拆成更小单元的函数:
function addMapping(router, mapping) {
  for (var url in mapping) {
    if (url.startsWith("GET ")) {
      var path = url.substring(4);
      router.get(path, mapping[url]);
      console.log(`register URL mapping: GET ${path}`);
    } else if (url.startsWith("POST ")) {
      var path = url.substring(5);
      router.post(path, mapping[url]);
      console.log(`register URL mapping: POST ${path}`);
    } else {
      console.log(`invalid URL: ${url}`);
    }
  }
}

function addControllers(router) {
  var files = fs.readdirSync(__dirname + "/controllers");
  var js_files = files.filter((f) => {
    return f.endsWith(".js");
  });

  for (var f of js_files) {
    console.log(`process controller: ${f}...`);
    let mapping = require(__dirname + "/controllers/" + f);
    addMapping(router, mapping);
  }
}

addControllers(router);
2
3
4
5
6
7
8
9
10
11
12
13
14
15
16
17
18
19
20
21
22
23
24
25
26
27
28
29
30
确保每个函数功能非常简单,一眼能看明白,是代码可维护的关键。
# Controller Middleware
最后,我们把扫描 controllers 目录和创建 router 的代码从 app.js 中提取出来,作为一个简单的 middleware 使用,命名为 controller.js:
const fs = require('fs');

function addMapping(router, mapping) {
    ...
}

function addControllers(router, dir) {
    ...
}

module.exports = function (dir) {
    let
        controllers_dir = dir || 'controllers', // 如果不传参数,扫描目录默认为'controllers'
        router = require('koa-router')();
    addControllers(router, controllers_dir);
    return router.routes();
};
2
3
4
5
6
7
8
9
10
11
12
13
14
15
16
17
这样一来,我们在 app.js 的代码又简化了:
...

// 导入controller middleware:
const controller = require('./controller');

...

// 使用middleware:
app.use(controller());

...
2
3
4
5
6
7
8
9
10
11
← 入门 使用Nunjucks →